Build a Stud Wall and Fasten Drywall
In this article, you will find:
Blocking and laying studs
Blocking Maneuver
While placing blocking at the ceiling was the key to this basement wall, the job called for some monkeying around, and the use of 412" lag bolts. You may have to loosen some pipe clamps to move pipes closer to the ceiling. Although this sounds hazardous, most long sections of pipe have some flexibility once you disconnect the straps.

Even the blocking did not prevent this curvy electrical conduit from bumping against the top plate, so we gouged the top plate with a saw and a chisel. Improvising comes with the territory when you're building a basement wall!
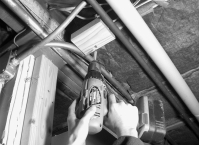
With the blocking in place, attach the top plate beneath it with lag bolts. To prepare for 5⁄16" × 41⁄2" lag bolts, use two long drill bits: drill a 5⁄16" hole through the top plate and blocking, and a 1⁄4" hole in the joist. Lag bolts have a reputation for being tough customers, but the threads only need to grab in the joist, not the blocking or plate. The 5⁄16" hole lets the bolt slip through the blocking and top plate while grabbing only the joist.
Step 4: Laying the Studs
Positioning the plates is the hard part; the work gets easier as we start fastening the studs. Place one stud at each wall (they should already be in place against concrete walls) and one at the edge of each doorway.
Normally, studs are placed 16" O.C. (on center), which leaves 141⁄2" gaps between studs. But if you start a stud against an adjoining wall, the first stud should not be 16" O.C. Otherwise, the center of the fourth stud will be 48 3⁄4" from the adjoining wall—too wide for a 48" sheet of drywall. You may be able to skirt this problem by running the drywall sheets horizontally. See the drawing for spacing of studs near a corner, and make sure you have studs at all drywall joints.