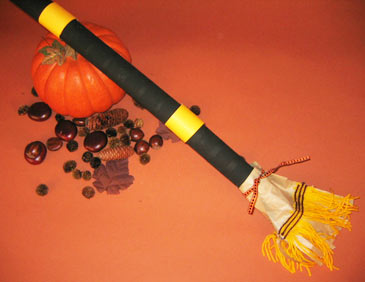
Magic Broomstick
Magic Broomstick

Time: An afternoon
Type of activity: Arts and Crafts
Every witch needs a broom! Help your child make one of her own.
Materials needed:
· Paper towel tubes (3)
· 2 paper lunch bags
· Yarn (Yellow and brown)
· Scissors
· Glue
· Stapler
· Masking tape
· Paint
· Paintbrush
· Markers
· Construction paper (one sheet)
What to do:
Step One: Cut two strips of construction paper about 2 inches wide and 6 inches long.
Step Two: Paint the paper towel tubes. Be creative -- think about what type of witch would ride this broom. A "reading witch" might paint a background color and then write her favorite book titles.
Step Three: Now, you're going to connect the paper towel tubes to make the broom's handle. Connect the edges of two paper towel tubes so they match up completely. Using the masking tape, secure the two edges together.
Step Four: Add a few drops of glue to one side of a strip of construction paper. Wrap the strip of construction paper (glued side down) around the taped edges of the tubes so it covers the tape completely. Repeat this step with the remaining paper towel tube and strip of construction paper.
Step Five: Cut a rectangle from the front of the paper bag. To do this, cut both sides and the bottom edge from the front of the bag. This will be your broom's "base."
Step Six: To make the broom's bristles, you'll cut slits into the base. Hold the rectangle length-wise and cut upwards from the bottom 5 inches high, making 10 or more slits.
Step Seven: Cut 20 or more stands of yellow yarn that measure 5 inches in length. These will also be your broom's bristles.
Step Eight: Spread glue over all the papers bristles, then lay the strands of yarn on the glue one at a time. Make sure the top edges of the yarn line up evenly.
Step Nine: Now, cut five strands of brown yarn that measure the width of the paper bristles.
Step Ten: Glue the strands of brown yarn over the edge of yellow yarn to act as a border (it should look like a T).
Step Eleven: Repeat steps Five through Ten to make the other side of your broom's base.
Step Twelve: When you have finished both broom bases, line them up, and staple the side and bottom edges (the bristled edges) together. Remember, don't glue the top edge!
Step Thirteen: Now you're going to sandwich the handle between the two halves of the broom. Place the handle in between the two bases, about an inch down. Staple the handle in place. Then, staple the top edges of the bases together.
Step Fourteen: After the glue dries, your broom is ready to work some magic!